How to Stop Your Dog From Pulling on the Leash (Loose-Leash Walking)
Stop leash pulling with this step-by-step protocol. Works for puppies and adult dogs. No prong collars or choke chains needed.
Alex Corsa
Founder & Editor ·
📖 Table of Contents
Affiliate Disclosure: As an Amazon Associate, we earn from qualifying purchases. This comes at no extra cost to you and helps support our independent testing and reviews. We only recommend products we genuinely believe in.
Leash pulling is the #1 complaint dog owners have about walking. You lurch down the sidewalk, the dog strains toward every smell, your arm aches, and neither of you is having fun. The good news: pulling is fixable at any age, and you don’t need special equipment or aversive tools to do it.
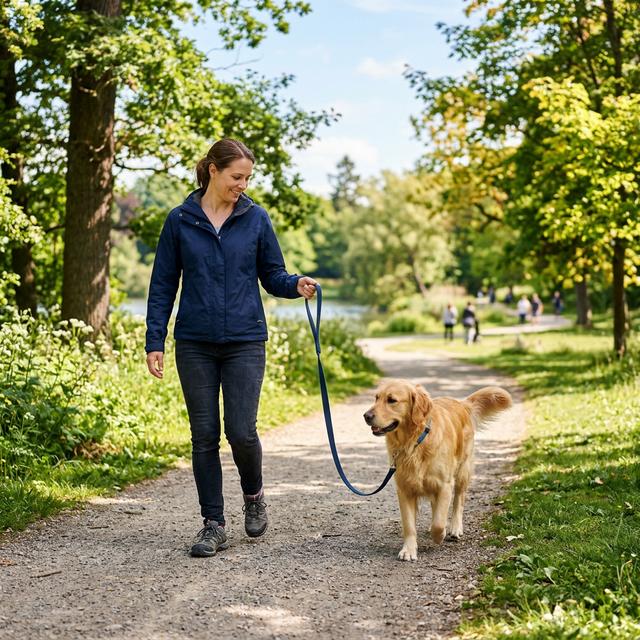
Loose-leash walking is simply teaching your dog that a slack leash gets them where they want to go, and a tight leash stops forward progress. Dogs pull because pulling works — they lunge toward the interesting smell and they get there. Your job is to reverse that equation.
TL;DR: Stop moving the moment the leash goes tight. Only continue forward when there’s slack. Reward heavily when the dog is at your side. This takes consistent repetitions over 4–8 weeks, not one training session. Use a front-clip harness if you need physical management while training.
Why Pulling Becomes a Habit
Puppies don’t know that pulling is undesirable. When they pull forward and you follow, they get exactly what they wanted — the smell, the dog, the grass. The pulling is reinforced thousands of times before most owners try to address it.
Adult dogs that have pulled their whole lives have a deeply ingrained behavior pattern backed by years of reinforcement. It can be changed, but it takes more time and consistency than starting from scratch with a puppy.
Why punishment doesn’t work: Yanking back on the leash teaches the dog to brace for the yank and pull harder in anticipation. Prong and choke collars create pain at the moment of pulling, which temporarily suppresses the behavior, but you’re always dependent on the collar — the dog hasn’t learned what to do instead.
Equipment for Loose-Leash Training
The leash: A 4–6 foot fixed-length leash gives you the right amount of control. Avoid retractable leashes entirely during training — they teach the dog to maintain tension (because the leash is always under some tension) and give you no consistent feedback about slack vs. tight.
The harness or collar: Two options that support training without causing harm:
- Front-clip harness: When the dog pulls forward, the clip at the chest redirects them sideways toward you, reducing the mechanical advantage of pulling. This doesn’t train the dog to stop pulling, but it makes pulling physically less rewarding and gives you better control while training. Our no-pull harness guide covers the best tested options.
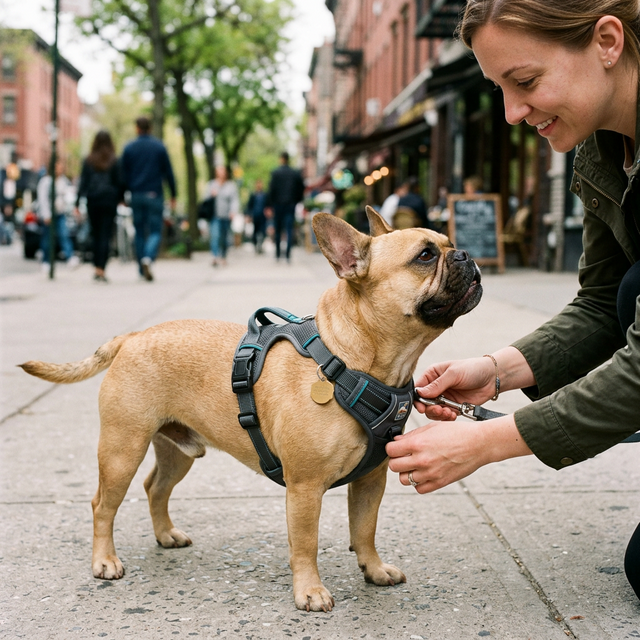 A front-clip harness redirects the dog sideways when they lunge, making strong pulls much easier to manage.
- Standard flat collar: Fine for dogs that are mild pullers or in the early puppy stages. Not recommended as the primary walking tool for strong, committed pullers.
What to skip:
- Prong/pinch collars (aversive, can redirect into frustration or fear)
- Choke chains (same issue)
- Head halters (work well for some dogs, but require careful introduction and sizing — the dog’s face is sensitive)
The Core Method: Stop-Go (Penalty Yards)
This is the foundational technique for all loose-leash training. It is simple, consistent, and works for all dogs.
The rule: When the leash is slack, you move forward. When the leash goes tight, you stop immediately.
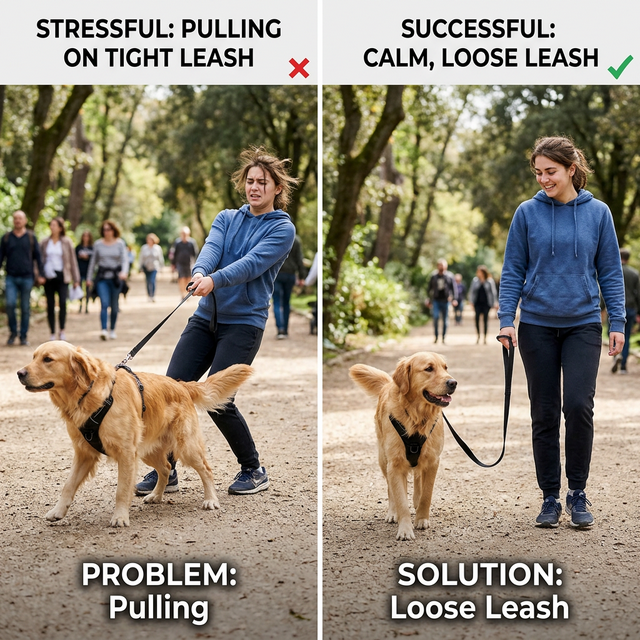 The goal is the right side — a slack leash with the dog checking in naturally.
Step by step:
- Start walking with your dog at your side or slightly ahead
- The moment the leash tension increases (before it goes fully taut), stop completely
- Stand still and wait — do not pull back, do not say anything
- The dog, confused that you stopped, will eventually turn to look at you or step back toward you
- The instant there is slack in the leash, say “yes!” or click and give a treat, then start walking again
- Repeat every single time the leash tightens
At first this feels impossibly slow. You may stop within 5 steps of your front door. That’s normal. The dog is doing what has worked for years. With consistency — every walk, every rep — they learn that maintaining tension stops forward progress.
Adding the Position Cue (Week 2+)
Once your dog is starting to self-regulate through the stop-go method, layer in a position cue — “heel,” “close,” or whatever word you choose.
Teaching the position:
- Lure the dog to your left side with a treat at your hip level
- Say “heel” as they find the position
- Take a few steps — reward every 3–5 steps while they maintain the position
- As they get reliable, increase the steps between rewards
The position isn’t required for loose-leash walking — your dog doesn’t have to be glued to your left side for the walk to be pleasant. The goal is a loose leash, which allows the dog to sniff and explore within the range of the leash without tension. The heel position is for specific situations where you need precise control (passing another dog, crossing a street, entering a doorway).
The “Be a Tree” Alternative
If standing completely still feels passive, try “Be a Tree” as an alternative:
- When the leash tightens, plant your feet firmly and shift your weight backward slightly
- The dog encounters resistance and cannot get further
- Wait for slack, then reward and move
This works especially well for strong pullers where stopping alone doesn’t produce enough contrast — they’re used to pulling against tension.
The Turn Method (Change Direction)
Another effective technique, especially useful in open spaces:
- When the dog pulls forward, do a smooth U-turn and walk the other direction
- The dog has to follow you (they’re on a leash), which disrupts the forward momentum
- When they catch up and are walking with you, reward with a treat and praise
The turn method teaches the dog to keep track of where you are rather than treating you as an anchor they’re dragging. Use it alone or combine it with the stop-go method.
Common Mistakes That Slow Progress
Inconsistency. The stop-go only works if it happens every single time the leash tightens. If you let it slide when you’re in a hurry, the dog learns that sometimes pulling works. Sometimes-reinforced behaviors are extremely persistent.
Letting the dog reach the goal. If your dog pulls toward a smell and eventually “wins” by getting to it (because you followed), you’ve reinforced the pulling. Make a point of not letting the dog reach what they’re pulling toward until the leash is slack.
Moving too fast through environments. Train in the easiest environment first (your backyard or front yard with no other dogs or people). Only move to more distracting environments once the behavior is solid in lower-distraction settings.
Too much slack to start. If your leash is long and loose, the dog can be pulling for several steps before you feel it. A shorter leash (4–5 feet) gives clearer feedback in both directions.
The Realistic Timeline
| Situation | Expected Timeline |
|---|---|
| 8–16 week puppy, first walks | 2–4 weeks for basics |
| 6-month puppy with some pulling history | 4–6 weeks consistent training |
| Adult dog, years of pulling | 8–12+ weeks, possibly longer |
| Adult dog, breed selected for pulling (Husky, Malamute) | 3–6 months, requires lifestyle management too |
Progress isn’t linear — you’ll have great walks and terrible ones. What matters is the trend over weeks, not individual sessions.
Managing a Strong Puller While Training
For large, strong dogs that make walks genuinely unsafe while training is ongoing:
- Front-clip harness: The most reliable tool for reducing pulling force while you train. See our no-pull harness picks for size-appropriate options
- Two-clip leash: Connects to both the back clip and front clip of a dual-clip harness, giving you back-end steering plus chest redirect
- Avoid the walk temporarily: For extreme pullers, a few weeks of off-leash backyard exercise + on-leash training sessions in the driveway may be more productive than struggling through full walks before the behavior changes
For brachycephalic breeds, pulling on any collar creates direct pressure on an already-compromised airway. Front-clip harnesses are essential — not optional — for flat-faced dogs. See our harness guide for brachycephalic breeds.
Frequently Asked Questions
My dog is perfectly behaved at home but pulls on leash. Is this normal?
Completely normal. The leash creates a novel physical sensation and the outdoors is a different environment with vastly more stimulation. Trained behavior in one context doesn’t automatically transfer to other contexts. You need to train loose-leash walking on-leash, outdoors, not just in the living room.
How do I stop my dog from pulling toward other dogs?
Leash pulling toward other dogs is often a subset of leash reactivity — high arousal around other dogs. The loose-leash protocol helps, but you may also need threshold-based training specifically for the dog stimulus. See our leash reactivity guide for the specific protocol.
How many treats do I need to carry?
More than you think at first — expect to reward every 3–5 steps in early training. As the behavior improves, you gradually increase the ratio (reward every 10 steps, then 20, then variable). Treat pouches that clip to your waistband make this practical. You can also use their kibble allowance during walks so you’re not adding calories.
Does a no-pull harness fix pulling without training?
No-pull harnesses reduce the force your dog can generate and redirect them when they pull, which makes walks manageable. But they don’t teach the dog a different behavior — remove the harness and the pulling is still there. Use the harness as a management tool while training the actual behavior.
You Might Also Like

Alex Corsa
Founder & Editor
Alex Corsa has owned and fostered dogs for over 12 years, with hands-on experience caring for everything from senior mastiffs to reactive rescues and brachycephalic breeds. He started DogSupplyFinder after spending two frustrating years testing gear that failed, broke, or simply didn't work as advertised. Every recommendation on this site has been vetted against real-world use — not affiliate commission rates. Alex cross-references veterinary guidelines and AAFCO regulations for all food and health content.
Dog Tips, Deals & Gear Guides
Expert buying guides, breed-specific product picks, and honest gear reviews. Plus our free New Puppy Checklist for subscribers.
📬 No spam, ever. Unsubscribe anytime. · Get the free puppy checklist